How to add 922 S5 Proxy in ixBrowser
Configuring the 922 S5 Proxy in the ixBrowser is a straightforward process. Follow the steps below:Step 1:
Register an account on the 922 S5 Proxy official website and download and install the 922 client.
Website: https://www.922proxy.com/
Step 2:
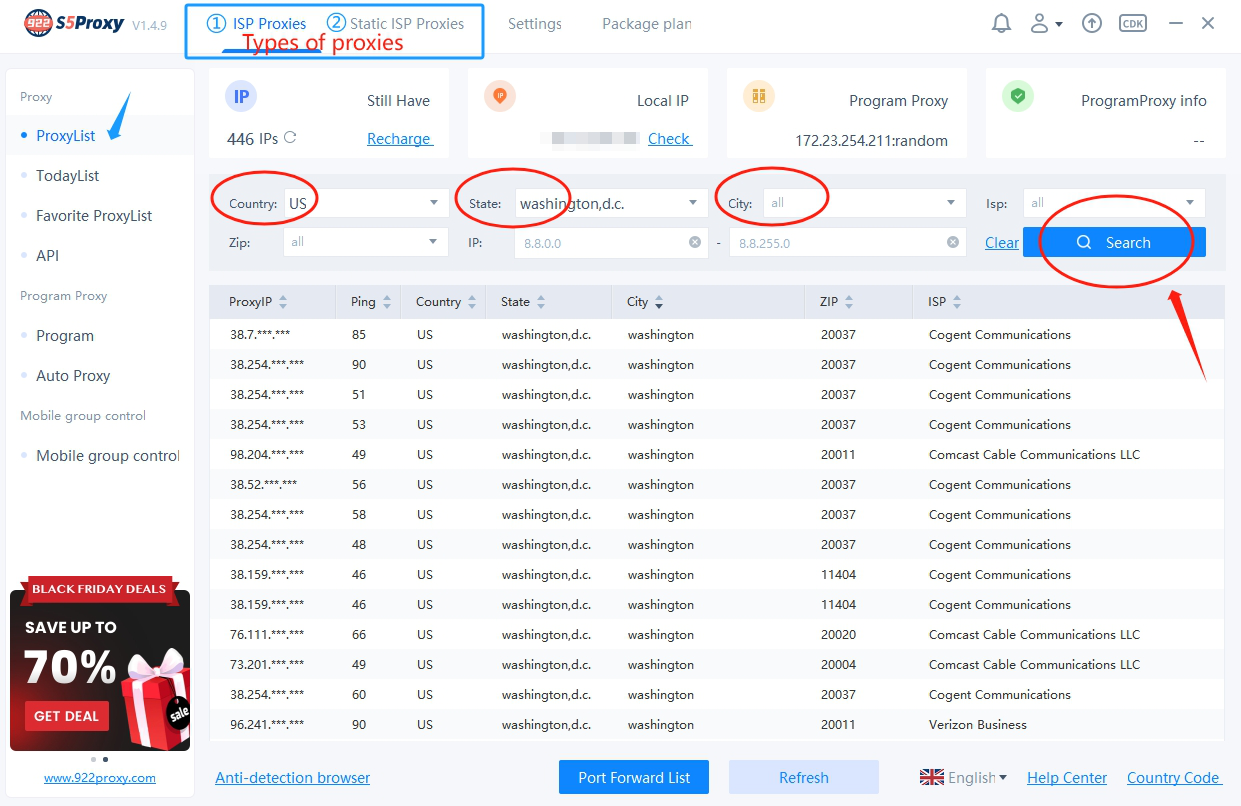
①On the ProxyList interface, filter by country, state, city, etc., then click Search to find proxies.
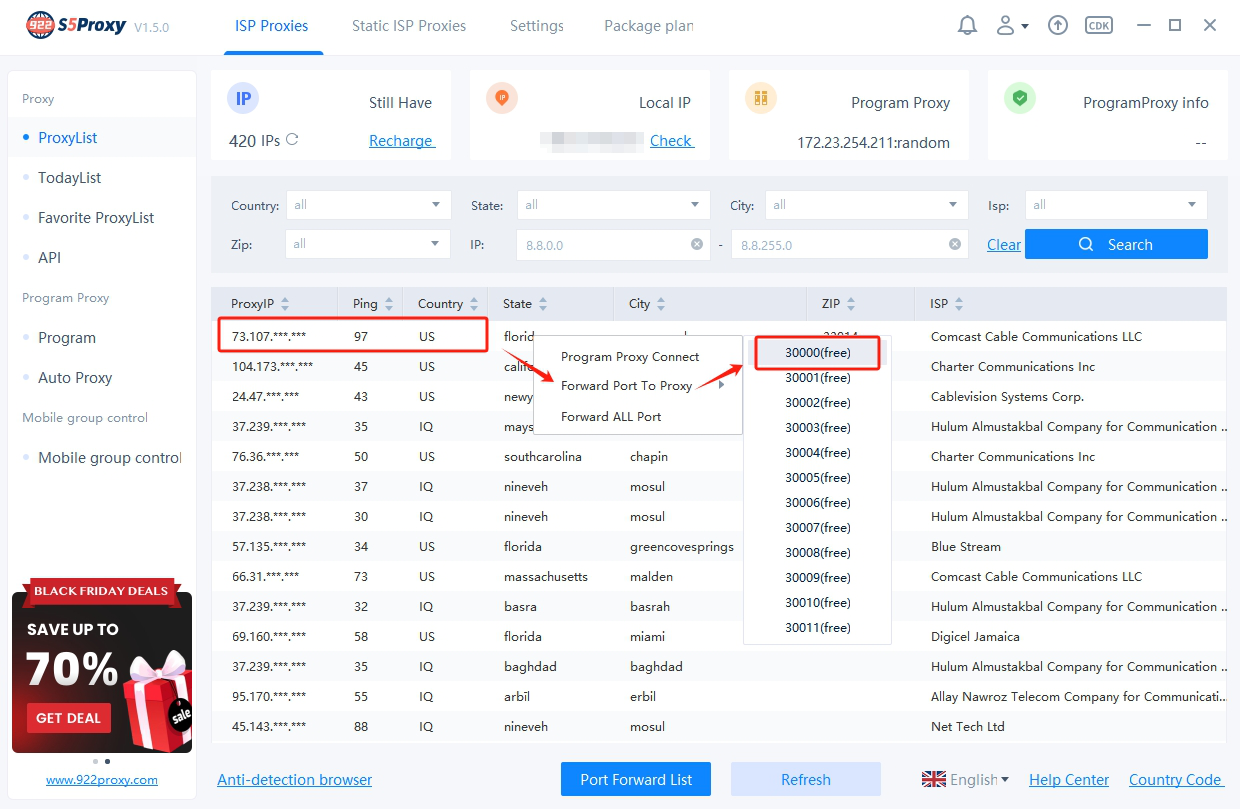
②Right-click on the desired proxy, select Forward Port to Proxy, and finally click on a port.
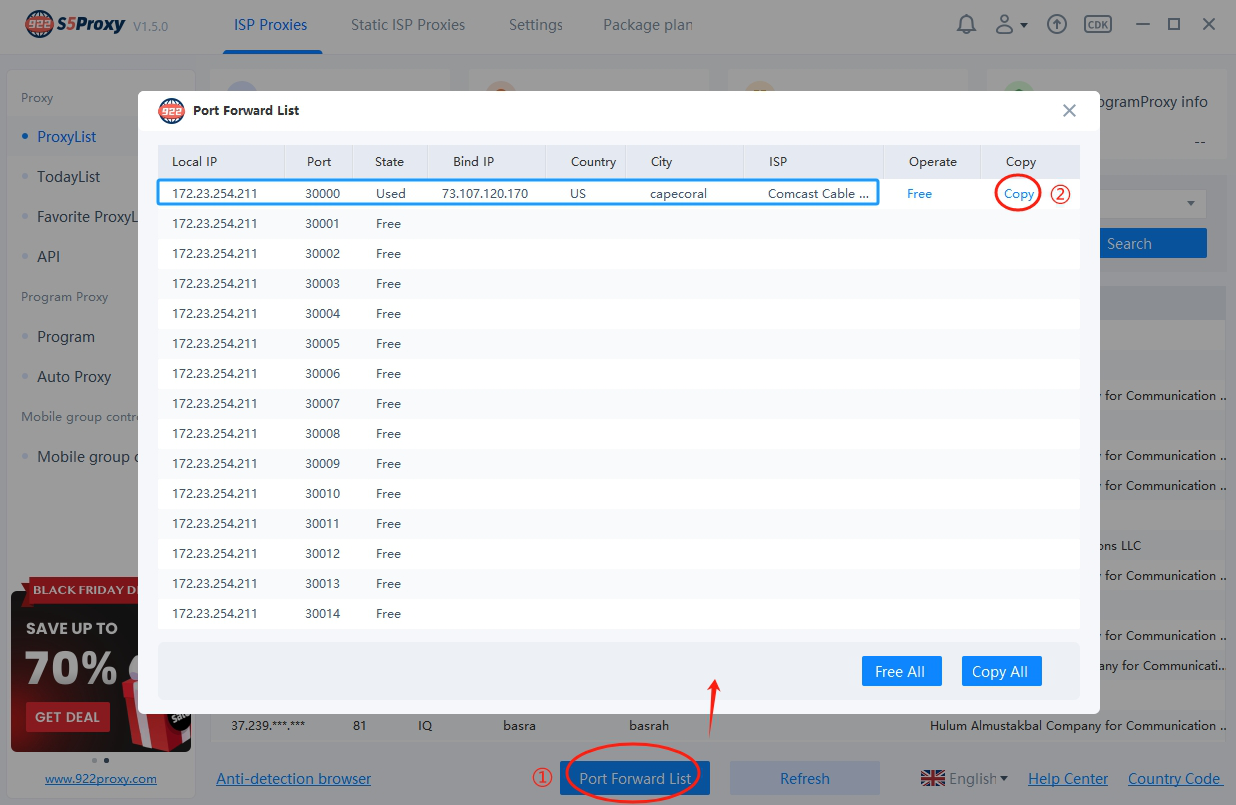
③Open the port forwarding list, copy the proxy information by clicking [Copy].
Step 3:
Open the ixBrowser client, click [Create Profile], choose Socks5 as the proxy type, paste the copied proxy information from Step 2 into the designated area, and finally click [Test] to check if the proxy is working.
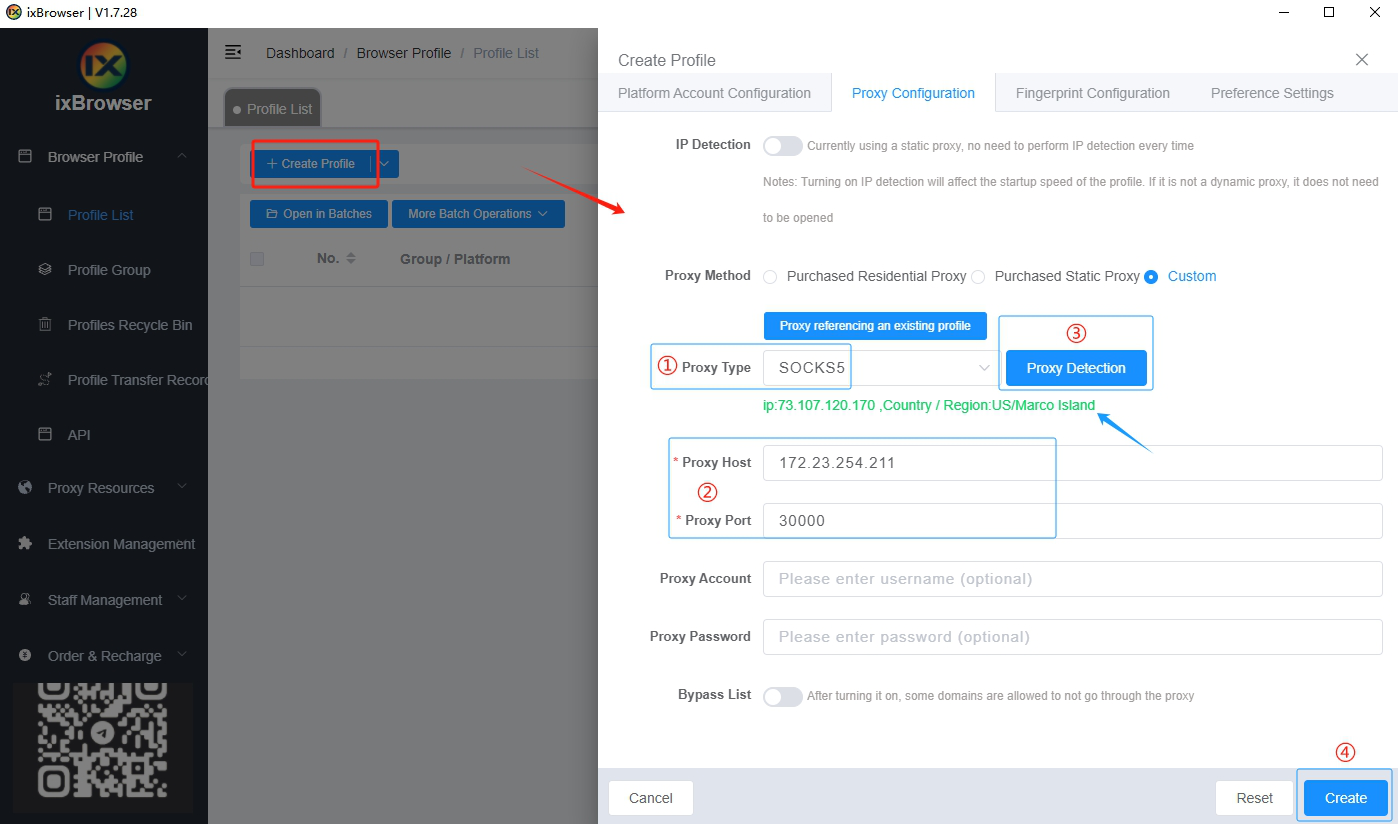
Once the proxy test is successful, showing detailed IP information, click [Create] to save the browser configuration. You can now use the browser normally.
The above instructions are for using the 922 S5 Proxy client. Another method is available using username and password authentication, which is web-based and doesn't require downloading a client.
Step 1:
Log in to your account on the 922 S5 Proxy website and navigate to the username/password authentication page.
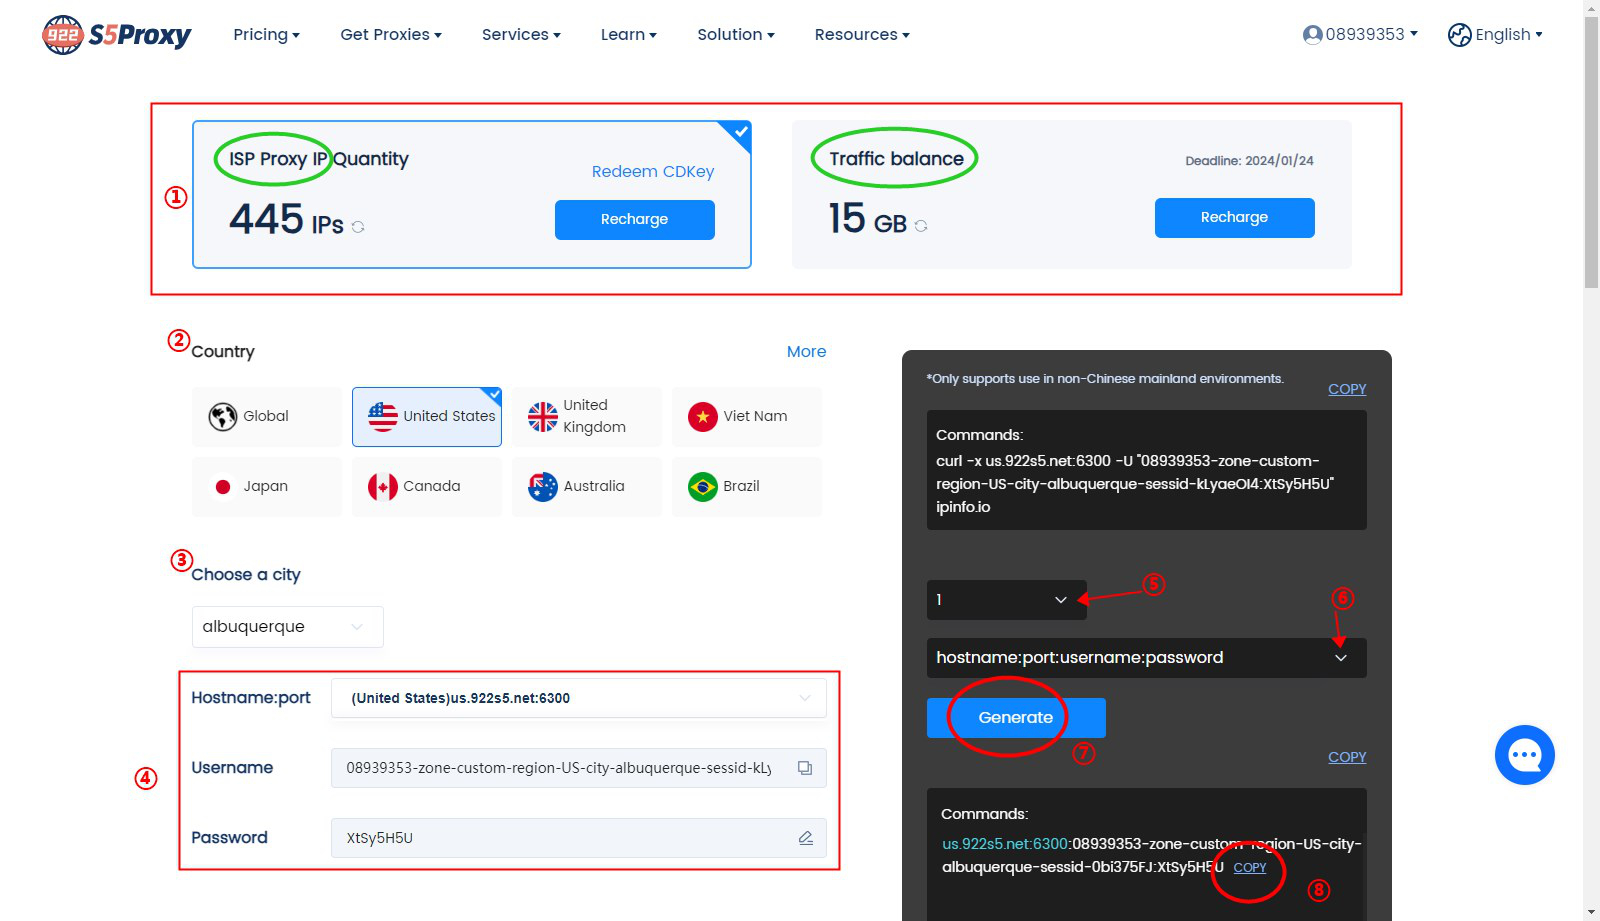
①Choose the ISP package type.
②Select the country.
③Choose the city.
④Enter the hostname, port, and your username and password information. The username is generated by default and cannot be changed, but the password can be modified.
⑤Select the number of commands to generate.
⑥Choose the format for the username and password.
⑦Click to generate.
⑧Click to copy.
Step 2:
Open the ixBrowser client, click [Create Profile], choose Socks5 as the proxy type, paste the copied proxy information from Step 1 into the designated area, and finally click [Test] to check if the proxy is working.
Note: When pasting in the blue box labeled ②, Proxy Port, Proxy Account, and Proxy Password will be automatically filled.
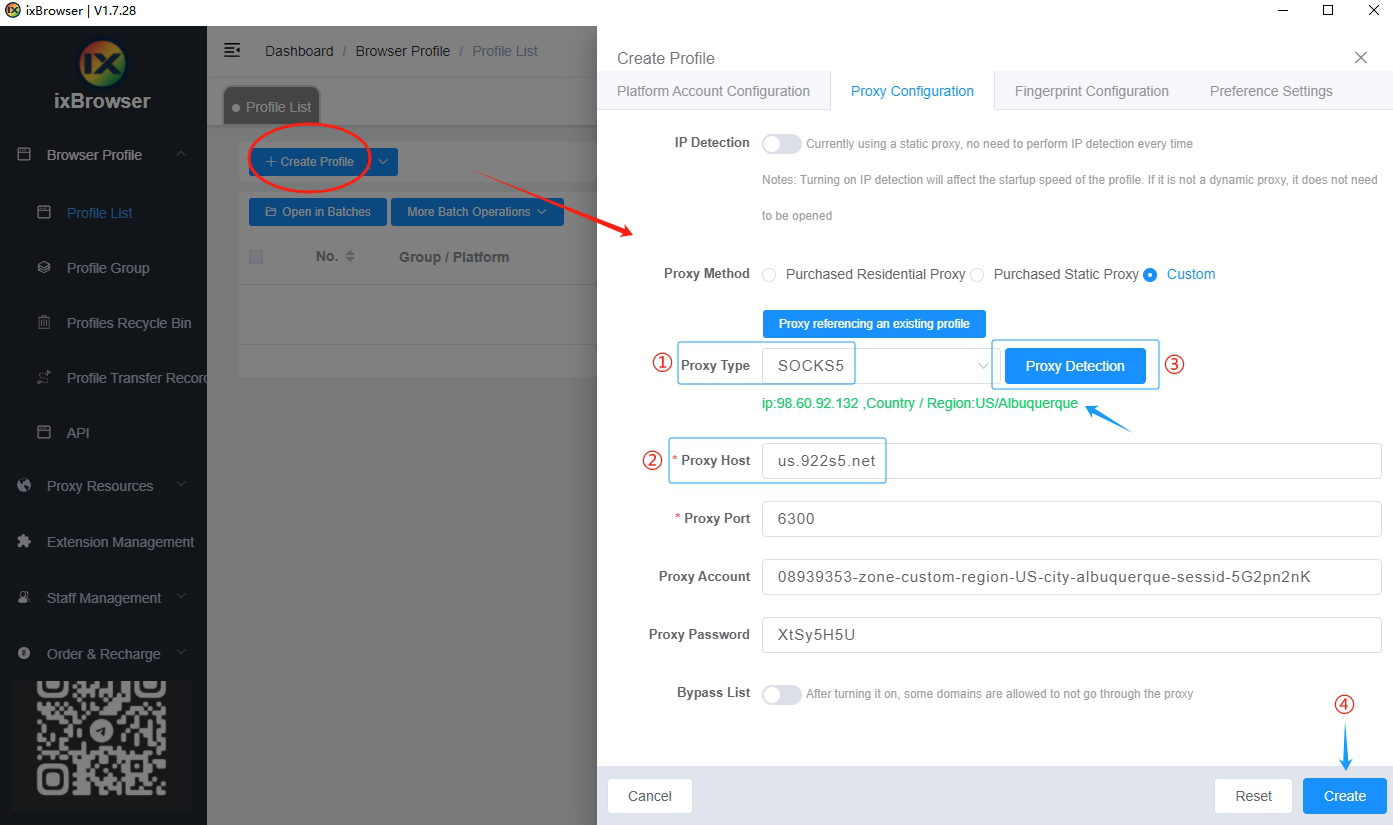
After a successful proxy test, showing detailed IP information, click [Create] to save the browser configuration. You can now use the browser normally.
For more features and promotional information, visit the official website: https://www.922proxy.com/


